Instructions on how to mount aluminum prints
to the wall
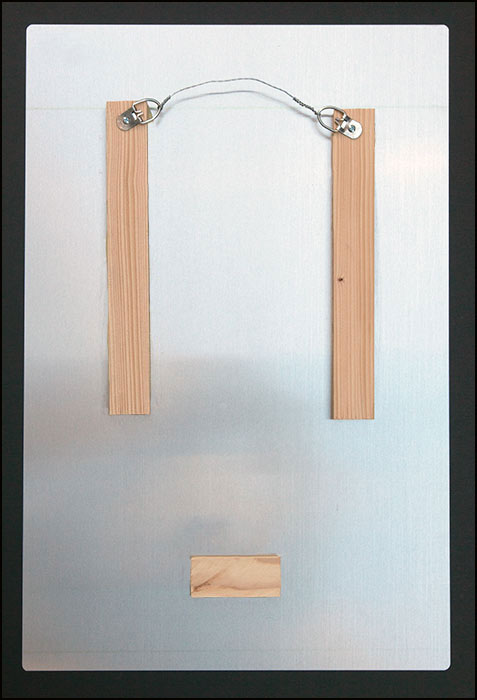
Printing and displaying of photography on aluminum is becoming more popular. I decided to create some of my images on metal and needed a consistent method to hang them on the wall. I could not find much information on this, so I decided to write about my experience and instruction on how I did it. Shown below is an aluminum print with the backside showing hanging hardware.
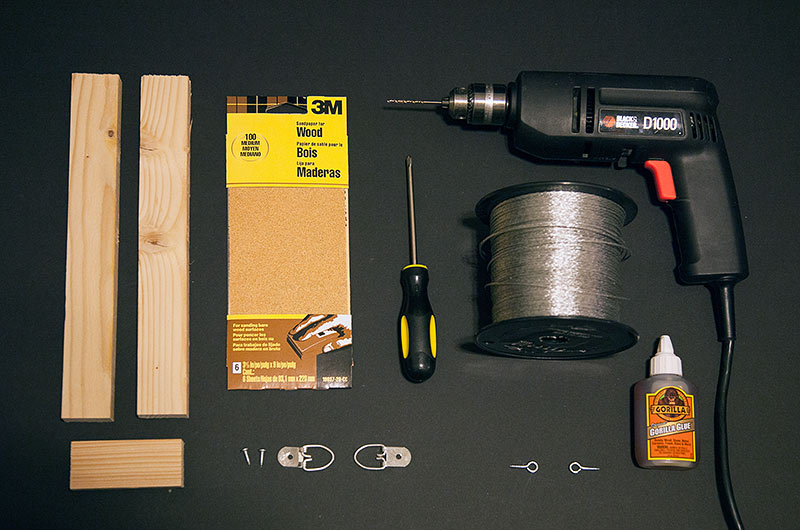
Aluminum mounting supplies:
Supply list:
Wood Post
Sandpaper
Screwdriver
Drill with small bit
Framing Hanging wire
D-rings with screws (preferred method)
Eye hooks
Gorilla Glue
I used
a 18" x 24" metal print in my examples, but you can adjust the size of the wood to meet larger or smaller sizes as well as dealing with horizontal or vertical prints.
At Home Depot I picked up the wood posts as shown in the photo for my 18" x 24" metal prints. The box calls them Grade Stakes that are 17 1/2" long and about 1/2" thick. Home Depot does not charge for the first two cuts so ask them to cut the posts into three parts. First have them cut off the top triangle sections which you can toss. Then have them cut off about 4-6 inches off and then the remaining length will be as is. The charge for each additional cut is very small so you could get the long wood posts and have them cut different lengths for different needs. I would bring a pen or marker with you and just mark right on the box were you want them to cut. The wood is cut while still in the box.
This is the wood that I found, but you could probably use different wood. Some people may prefer 1/4" versus 1/2" thickness.
I also bought the Gorilla glue and sandpaper at Home Depot and had the rest of the supplies at home, but you can probably find all the materials you need at Home Depot or your local hardware or art supply store.
My first attempt of attaching the wood to the smooth aluminum was with a generous supply of wood glue. The wood glue did not hold and my metal prints fell off the wall causing damage in the corners. I then tried Gorilla glue and put dots of it along the wood. The Gorilla glue does expand, so if you put to much on, it will ooze out on the sides of the wood when it dries. Before I put the wood down, I very slightly scratched the aluminum surface were the wood was to be placed with the sandpaper. This gives a better surface for the glue to stick to.
Aluminum mounting procedure:
__
1. Place aluminum print back side up on a clean surface with the top of the print on the top. Wipe the back side of the aluminum with a cloth to make it clean.
2. Select two of the longer wood lengths for the main support pieces. I chose to put the best-looking wood side facing up that the customer will see and put glue on the other side.
3. Using the drill, drill a hole in the two longer wood pieces about as deep as needed to put the screws into. (See Figure 1) This pre-drilling will make it easier to put in the screws later. Remove any loose wood particles, caused by the drilling, from the wood pieces. Also if you do the drilling away from the aluminum prints, you will not have to clean off the wood particles from the aluminum.
In the photo (Figure 1), the two left wood pieces show where I drill when using
D-rings, place the screw holes near the top center as shown in the photo.
While I prefer using D-rings, you can substitute Eye hooks. As you can see on the two wood pieces on the right (See figure 1), drill on the thinner sides of the wood about an inch from the top.
4. Using a screwdriver, attach the D-rings with screws using the pre-drilled holes as shown in the photo (Figure 2) on the two wood pieces on the left.
When using the eye hooks, manually screw them into the pre-drilled holes as shown on the two wood pieces on the right (Figure 2). You can use a pair of pliers to hold the eye hooks while you screw them into the wood. For very large or heavier metal prints, you may want to add a little glue into the eye hook holes.
Update: You may want to place the eye hooks screwed into the top of the wood facing up. I had a horizontal print, with a longer wire, bend with a slight curve with the eye hooks as shown in (Figure 2).
You do not want to put in the screws after you have glued the wood on the aluminum back since that will create a lot of pressure on the glued wood.
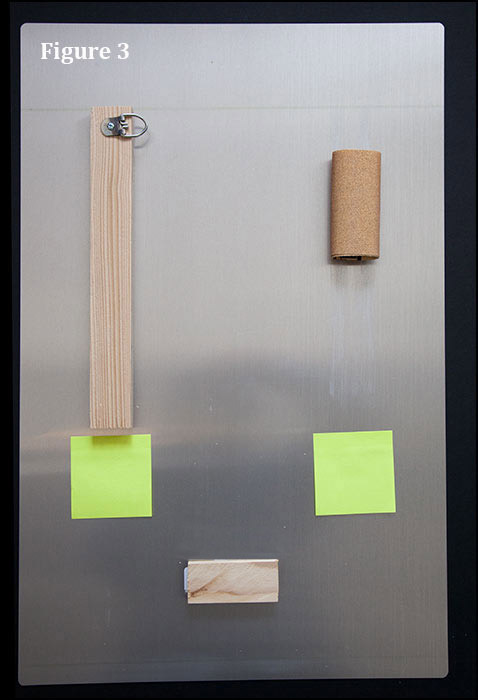
5. Take the sandpaper and scratch the aluminum surface slightly in the area that the three wood pieces will cover. You can see the scratch marks in the two photos (See Figure 3 and 4). Then use your cloth to clean off any metal or sandpaper particles left on the surface.
I wrapped a piece of sandpaper around a small piece of wood so that the width of the scratching matches the width of the larger wood piece.
I also placed removable post it notes, at the bottom of the two large wood pieces. This allows me to better locate the areas to scratch when the wood is removed and help me place back the wood in the correct position after the glue is applied.
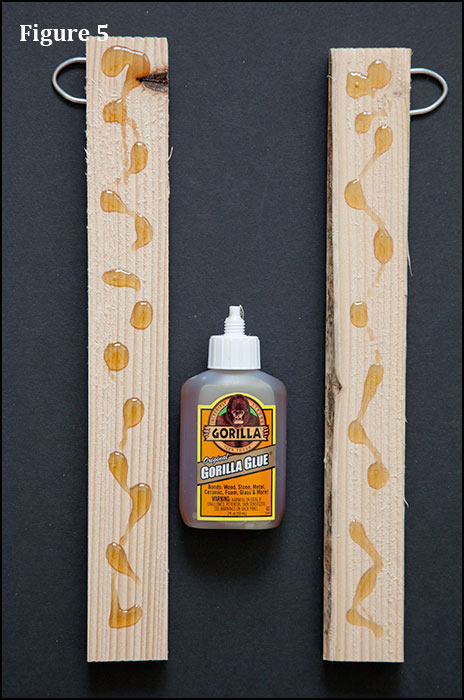
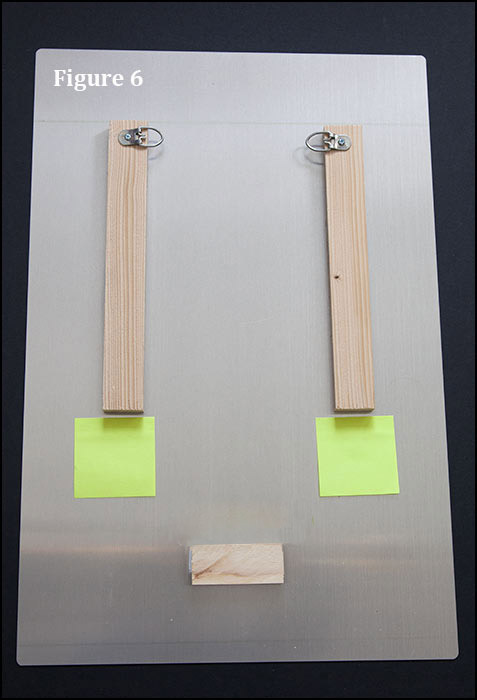
6. Place the Gorilla glue on the two longer pieces of wood (See Figure 5). Then place the wood pieces on the aluminum (See figure 6).
They should be inside from the edge since the frame will stick out 1/2" from the wall and you do not want to see the wood once the print is on the wall allowing the aluminum print to appear as it is floating. See an example of how much glue I use and adjust for what works for you. Remember that the Gorilla glue will expand as it dries.
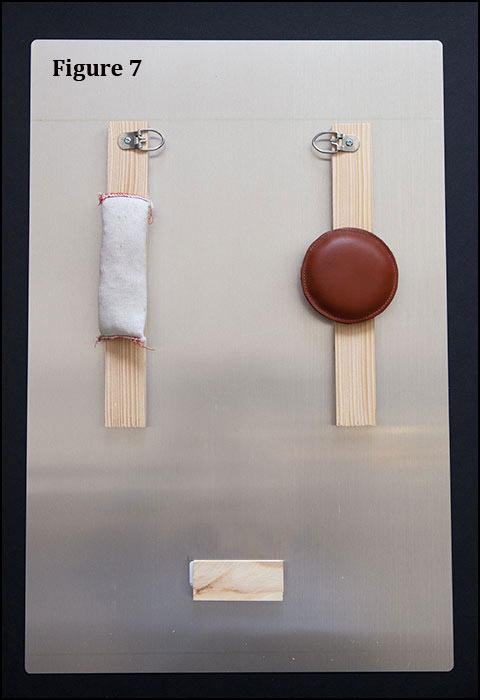
7. Place a small weight on the wood so that the wood pieces will be flat as the glue dries (See figure 7).
8. Place glue on the small piece of wood and place it in the center towards the bottom of the print.
If you do not use this third piece of wood, you may have a slight angle to your print when it hangs on the wall. For much larger prints you may need to put two small pieces of wood on the bottom. You can place weights on the small pieces of wood also.
9. Leave the aluminum print backside up aside on a flat surface while the glue dries and work on the next print.
10. Once the glue dries, test the bond of the wood to the aluminum. If it feels good, you are ready to wire.
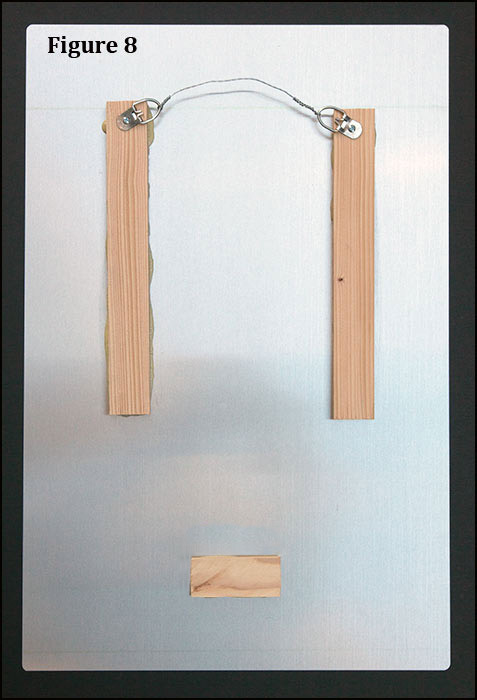
In the final photo (Figure 8) you can see I used a little too much glue and it spilled out slightly onto the aluminum. I left it like this for the instructional photo but will take a blade and cut out the excess glue before displaying it for the customer.
11. Determine the wire length and attach the wire with a slight curve since the wire does not have to be tight (See Figure 8). You can see I also arranged the D-rings slightly at an angle to put less pressure on the wire/print and cause the metal print to bend inwards when hanging. I had this problem when using the eye hooks on a horizontal metal print.
12.
The aluminum print is ready to hang on the wall. Once on the wall, determine if the print lays flat and you can not see the wire or wood when looking from the side. If there is a slight angle to the hanging print, you can increase the width of your small wood piece on the bottom. This can be done by adding two frame bumpers or glue a piece of foam core or a 4 ply mat to the block.
Enjoy your aluminum print on your wall.
I advise that for your first frame, you let it hang for a week to see how it works before doing additional frames. If you want, you can place a blanket or pillow below the metal prints on the wall to catch it if it falls while you get your technique down.
While this may seem like a lot of steps, it can go fast if you have 2 or more prints to do at once. I drill the holes in a bunch of wood pieces at once since that saves me the time of doing each one as I need them. I also attach the D-ring or Eye hooks in advance to the wood. This makes the other steps go much faster and you can do each one in a short time.
The commercial printers of your aluminum prints may offer one or more options to hang your prints at an additional cost. Most of these methods require the back to be hooked to a screw head that goes into the wall. The method described in this article is using a hanging wire which gives you additional options for hanging at art shows with a simple S hook. If you are doing many of these such as to sell, it is less expensive to put on the hanging backing yourself at only a few dollars each.


 For very large or heavier metal prints, you may want to add a little glue into the eye hook holes.